Introduction
Level 2 EV charger installation is a moderately complex electrical project — one that requires a dedicated 240-volt circuit, proper permitting, and a licensed electrician in most Iowa jurisdictions.
Skipping steps carries real consequences: overloaded panels, voided manufacturer warranties, failed municipal inspections, and documented fire risk from improperly wired high-amperage circuits.
This guide is written for Des Moines metro homeowners — especially those with older homes — who want to understand the full process before committing. You'll learn what each step involves, what your panel needs to support it, and which questions to ask your electrician before work begins.
TLDR:
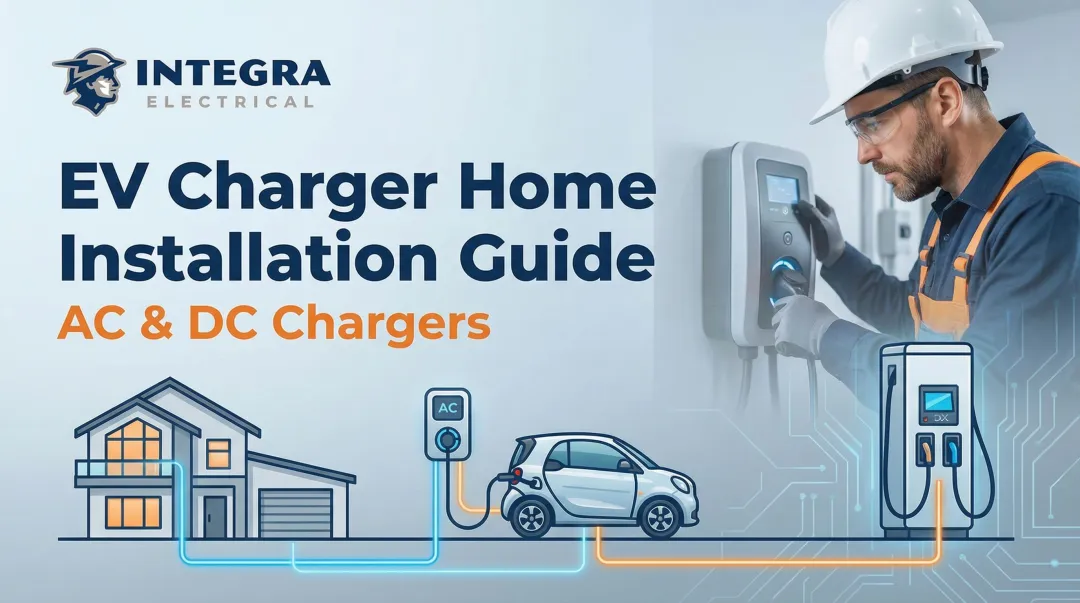
- Level 2 chargers operate on a 240V circuit and charge 4–8 times faster than a standard 120V outlet — a meaningful daily upgrade for EV owners
- Your panel must be assessed for capacity first — older homes often need upgrades or load management before installation can proceed
- Total installed cost typically ranges from $900 to $2,500, with panel upgrades potentially adding $1,300–$4,000
- Installation follows five steps: panel assessment, permit application, circuit installation, charger mounting, and final testing
- Always use a licensed electrician — permits are required in most Iowa jurisdictions, and improper wiring on a sustained high-amperage circuit is a documented fire hazard
What You Need Before Installing a Level 2 EV Charger
A Level 2 charger is a 240-volt device that typically draws between 40 and 80 amps, delivering approximately 25 miles of range per hour versus just 5 miles per hour with a standard 120-volt Level 1 outlet. That difference transforms overnight charging from "maybe enough" to "always ready" for most daily EV drivers.
Prerequisites and Safety Considerations
Before installation can proceed, several non-negotiables must be in place:
- Available breaker capacity: A dedicated 40–60 amp breaker slot must be available (or creatable) in your electrical panel
- Adequate total panel amperage: The panel must have sufficient total capacity to support the new load
- Proper wire gauge: Wiring must meet National Electrical Code requirements for the load — typically 6 AWG copper wire for a 50-amp circuit supporting a 40-amp continuous charger
The older home challenge: Homes 30 years and older — common throughout the Des Moines metro — frequently have 100-amp panels, outdated wiring, or known-problem panel brands like Federal Pacific Electric (FPE) and Zinsco. Testing has shown that 51% of FPE Stab-Lok breakers failed to trip during overloads, creating severe fire hazards. Zinsco panels suffer from design flaws that cause breakers to melt and weld to the bus bar, failing to protect your home during an overcurrent event.
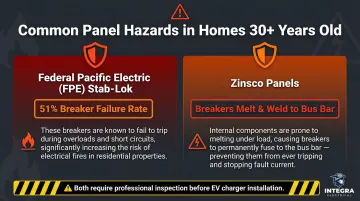
Both panel types must be addressed before a Level 2 charger can be safely added — and neither problem is visible without a professional inspection.
Permit requirements: Most Iowa municipalities — including Des Moines — require an electrical permit for EV charger installation. The City of Des Moines requires permits and licensed electricians for this work. Skipping the permit can void your homeowner's insurance coverage, complicate home resale, and disqualify you from available rebates.
Site readiness checks:
- Confirm the mounting surface (garage wall, exterior wall, carport) is structurally sound
- Identify whether installation will be indoor or outdoor (outdoor requires weatherproof-rated equipment and conduit)
- Measure the distance from the electrical panel to the intended charger location — longer runs increase both material and labor costs
Once you've worked through that checklist, you'll have a clear picture of whether installation can move forward as-is — or whether your panel needs attention first.
If your panel is at or near full capacity, or your home has known wiring issues, that work comes before the charger. Integra Electrical's complimentary Safety Evaluation is designed to uncover exactly these kinds of hidden risks in older Des Moines-area homes before any installation begins.
How to Install a Level 2 EV Charger: Step-by-Step
Installation follows a defined sequence. Skipping or reordering steps — especially doing electrical work before permits are in hand — commonly causes failed inspections, rework, and safety issues.
Preparing the Site and Pulling the Permit
The process begins with the electrician's assessment of your panel, a load calculation to confirm available capacity, and determination of the best charger location. Once the scope is confirmed, the electrical permit is pulled before any physical work begins. This is the legally required sequence in most jurisdictions, and it protects you from costly corrections later.
Mounting the Charger Unit
The charger is mounted securely to a stud or solid backing at a height where the cable reaches your vehicle's charging port without tension.
Outdoor units require a weatherproof enclosure rated for exterior installation — protecting against moisture, temperature swings, and physical damage.
Running the Dedicated Circuit
This is the core electrical work:
- A new dedicated breaker is installed in the panel, sized according to the charger's continuous load (typically a 50-amp breaker for a 40-amp charger)
- Appropriately sized conduit and wire (usually 6 AWG copper for 50-amp circuits) are run from the panel to the charger location
- Connections are made at both the panel and charger ends
This step requires turning off the main breaker and is where licensing and experience matter most. Improper terminations, incorrect wire gauge, or overloaded circuits create fire hazards.
Hardwired vs. plug-in (NEMA 14-50) installations:
- Hardwired: Connects directly to the circuit, offers a cleaner install, and is generally preferred for outdoor or permanent setups
- Plug-in (NEMA 14-50): Allows the charger to be swapped out more easily, but the outlet must be professionally installed first. Per NEC code, the outlet requires GFCI protection — though this can cause nuisance tripping with some EV chargers
Post-Installation Testing and Inspection
Before wrapping up, the electrician runs through several verification steps:
- Tests voltage at the circuit and confirms breaker function
- Verifies the charger powers on and communicates with the vehicle correctly
- Schedules the municipal inspection to confirm code compliance
Don't skip that final inspection. It's what makes the installation legally complete — and what activates rebate eligibility.
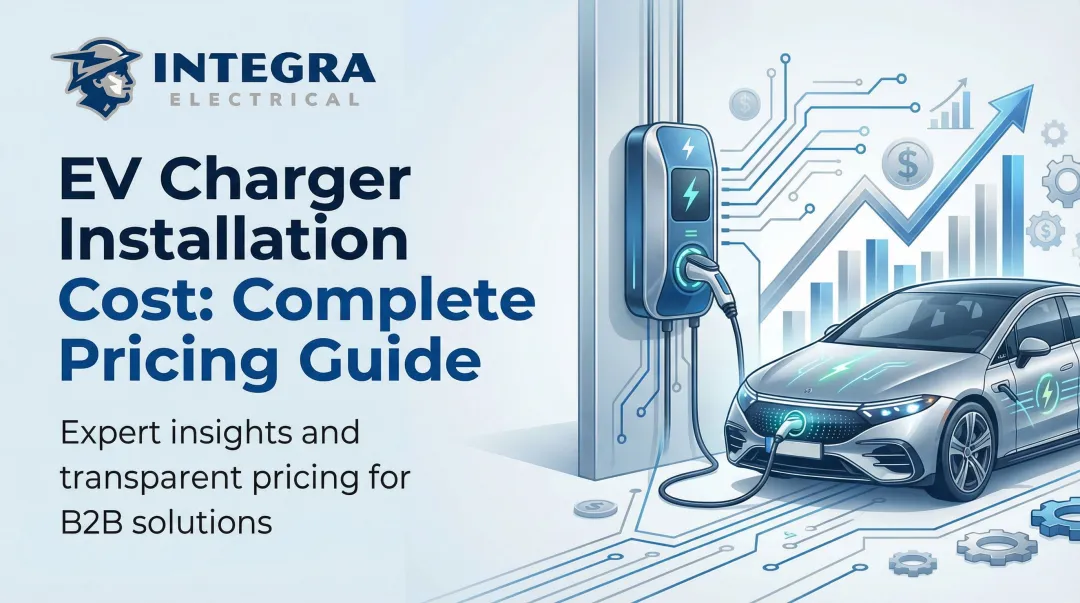
How Much Does Level 2 EV Charger Installation Cost?
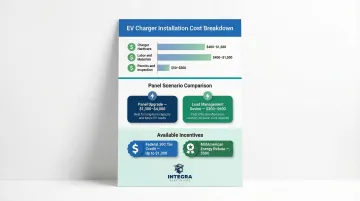
The total all-in cost for a Level 2 charger installation typically ranges from $900 to $2,500 for straightforward installations in homes with available panel capacity. Complex installs involving long wire runs, outdoor weatherproofing, or panel upgrades push costs higher.
Cost Components
| Component | Typical Range | Notes |
|---|---|---|
| Charger Hardware | $400–$1,200 | Varies based on amperage, Wi-Fi, and smart features |
| Labor & Materials | $400–$1,500 | Covers electrician time, wiring, conduit, and breaker |
| Permits & Inspection | $50–$300 | Municipal permit and inspection fees |
Distance from the panel to the charger location is the primary cost driver for labor and materials. Panel capacity is the other major variable — and the one that catches most older-home owners off guard.
The Panel Upgrade Question
Many older homes need either a panel upgrade or a load management device to safely support a Level 2 charger:
- Panel upgrade (100A to 200A): Costs between $1,300 and $4,000, depending on complexity. This removes the capacity constraint entirely.
- Load management device: Costs between $300 and $600. More affordable, but works within existing capacity by dynamically limiting charger draw when other appliances are running.
Trade-off: A panel upgrade is a one-time fix that supports future electrical needs. Load management is less expensive but may slow charging during peak home usage.
Available Incentives
Federal 30C Tax Credit — 30% of installation cost, up to $1,000, available through June 30, 2026. Eligibility is restricted to qualifying low-income or non-urban census tracts.
MidAmerican Energy Rebate — $500 back on residential Level 2 charger installation, valid through December 31, 2026. The charger must be installed by a licensed electrician on a dedicated GFCI-protected circuit.
Both incentives require a permitted, professional installation to qualify.
Common Installation Problems and How to Fix Them
Undersized or Full Electrical Panel
Problem: The existing panel doesn't have the capacity or available breaker slots to support a dedicated 40–60A circuit.
Likely cause: Older 100A panels common in Des Moines homes built before the 1990s, or panels already loaded with HVAC, appliances, and other circuits. Approximately 31% of U.S. homes have 100-amp panels or less.
Fix: Either upgrade the panel to 200A service or install a load management device that dynamically limits charger draw to available capacity. Both require a licensed electrician. Skipping this step and wiring a charger onto an overloaded panel is a documented cause of electrical fires.
Charger Not Communicating with Vehicle or Failing to Charge
Problem: The charger powers on but the vehicle doesn't begin charging, or charging stops unexpectedly.
Likely cause: Wiring error at the breaker or charger terminal, ground fault, or GFCI tripping due to a wiring fault.
Fix: Have the electrician recheck all terminations and verify correct ground and neutral connections. Key steps include:
- Confirming wire gauge matches the circuit amperage
- Verifying ground and neutral are correctly landed
- Checking for GFCI tripping caused by a wiring fault
Do not attempt to diagnose wiring issues without turning off the circuit first.
Failed Permit Inspection
Problem: The installation fails the municipal electrical inspection.
Likely cause:
- Incorrect wire gauge for the circuit amperage
- Improper conduit type or installation method
- Missing weatherproofing on outdoor components
- Charger mounted without proper clearances
Fix: The electrician corrects the cited deficiencies and schedules a re-inspection. Failed inspections happen far more often with unlicensed or first-time installers — another reason to hire an electrician experienced with EV charger work from the start.
Pro Tips for Getting Your Level 2 Charger Installation Right
Install close to the panel: Every additional foot of wire run adds material cost and labor time. If your garage and panel are on opposite ends of the house, factor this into your budget upfront.
Don't oversize the charger unnecessarily: Most EVs charge fully overnight on a 40-amp circuit. A 60-amp or 80-amp charger won't charge your car faster if the onboard charger can't accept that rate — it just adds installation cost. Confirm the right size for your vehicle before specifying.
Get the installation permitted and inspected: Unpermitted EV charger wiring is one of the most common reasons homeowners are denied insurance claims after electrical fires, and it can complicate home sales. Any licensed electrician — including Integra Electrical — should pull the required permits as a standard part of the job, not an optional add-on.
Plan ahead if your home is 30+ years old: Older homes often have wiring that predates modern load requirements. Budget for a panel assessment upfront rather than treating it as a surprise.
Frequently Asked Questions
How much does it cost to put a level 2 charger in your home?
Typical all-in installed cost ranges from $900 to $2,500. The final price depends heavily on panel capacity, wire run distance, and whether a panel upgrade is needed.
What is required for level 2 charging at home?
You need a 240V dedicated circuit with a properly sized breaker, a compatible charger unit, and a licensed electrician to install and permit the work.
Can a normal electrician install an EV charger?
A licensed electrician can legally install an EV charger, but experience with EV-specific requirements — load calculations, permit process, and high-amperage continuous circuits — matters. Using an unlicensed installer voids most warranties and rebates.
Can I just plug my EV into a 240V outlet?
Some Level 2 chargers use a NEMA 14-50 plug, but that outlet still requires professional installation. Don't use an existing 240V appliance outlet (like a dryer outlet) unless an electrician has confirmed it can handle continuous EV charging loads.
Is it better to hardwire a level 2 charger?
Hardwiring offers a cleaner, more permanent installation and works better for outdoor setups. A plug-in NEMA 14-50 setup makes charger replacement easier down the road. Either approach works safely when a licensed electrician does the job.
Is 200 amps enough for a house with EV charger?
A 200A panel is sufficient for most homes adding a single Level 2 charger — as long as open breaker slots exist and existing loads aren't already near capacity. An electrician's load calculation will confirm whether your panel qualifies.